[Crops 101] How to Sow and Harvest Poplar
November 18, 2021
Welcome to your next "Crops 101" lesson of the Farming Simulator Academy! Today, we’re focusing on poplar. We’ll show you how to plant, harvest and sell it. Let’s go!
What's special about poplar?

- Poplar can be harvested year-round
- Poplar grows back after the harvest
- By harvesting poplar, you get wood chips
- You can harvest with a special harvester or a baler
What you need for poplar
Let’s take a look at everything you need to plant and harvest poplar. Please note, you need special equipment for this task. Make sure you have the required amount of cash in your account account.
- This is a special one! For poplar, you don’t need to prepare the field. No initial plowing or cultivating necessary. Only after the third harvest, you need to plow to avoid a yield penalty.
- You need a tractor + weight attachments. You require weights in addition to various tools, so the front wheels of your tractor don't lose traction because of the heavy machinery attached in the back. They counter the weight of tools. More info in the equipment section.
- You need a planter to attach to your tractor and a poplar saplings pallet. In the ‘Forestry Equipment’ category of the shop, you find suitable tree planters. The pallets are found in the “objects” tab of the shop under “pallets”.
- Tip! Poplar grows back. You don’t need to plant again after harvest, unless you plow. You can fill the planter with poplar from the previous harvest!
- You need a fertilizer spreader, fertilizer and lime. Without, the income from your harvested crops will be lower. For beginners, artificial fertilizers are the best choice. You find both lime and fertilizer in the BigBag section of the shop. A fertilizer spreader is found in the fertilizing technology category.
- Tip! If your field needs lime, it will be shown in the right corner box if you’re standing on the field and on the map in the menu.
- You need a harvester: There are two options! Either you use a special harvester + header or a baler with a bumper. With the latter, you can harvest the poplar and press it directly into bales. You save a lot of money by using a baler instead of a harvester.
- Tip! You can click on “Poplar” in the “Packs” Section of the shop to see related equipment.
- You also need a trailer to transport and sell the poplar. The type of trailer you need, depends on the way you harvest the poplar. See our recommendations in the following equipment selection,
Equipment Selection (recommendation)

Our choice: We chose the following equipment. Usually, most farmers would use the New Holland FR 780 + New Holland 130FB header to harvest the poplar. BUT, alternatively, the Anderson BioBaler WB-55 can be used. It's far cheaper and presses the poplar directly into bales. You save almost $400,000 on equipment.
- Tractor: John Deere 7810
- Planter: Damcon PL-75 + AGCO 1100*
- Fertilizer: BREDAL K105 + CLAAS W600*
- Harvester (Baler + Bumper): Anderson BioBaler WB-55 + Anderson Bumper
- Alternative: New Holland FR 780 + New Holland 130FB header
- Trailer: Anderson RBM 2000
- Alternative: Kaweco Radium 255 (used with New Holland FR 780)
Tip! If you want to save more money, you can switch to the FARMTECH DPW 1800 trailer instead of the Anderson RBM 2000. You just have to upgrade your tractor with a front loader attacher. Then you can pick up the bales with the Fliegl Schmetterling and load bales onto the trailer manually.
* Weight attachments recommended: Click on "combinations" on the shop page of a tool to display corresponding weights to attach to your tractor. You may use one weight module for multiple tools (see our recommendation) - small weight discrepancies are not critical.
Let’s go to work!
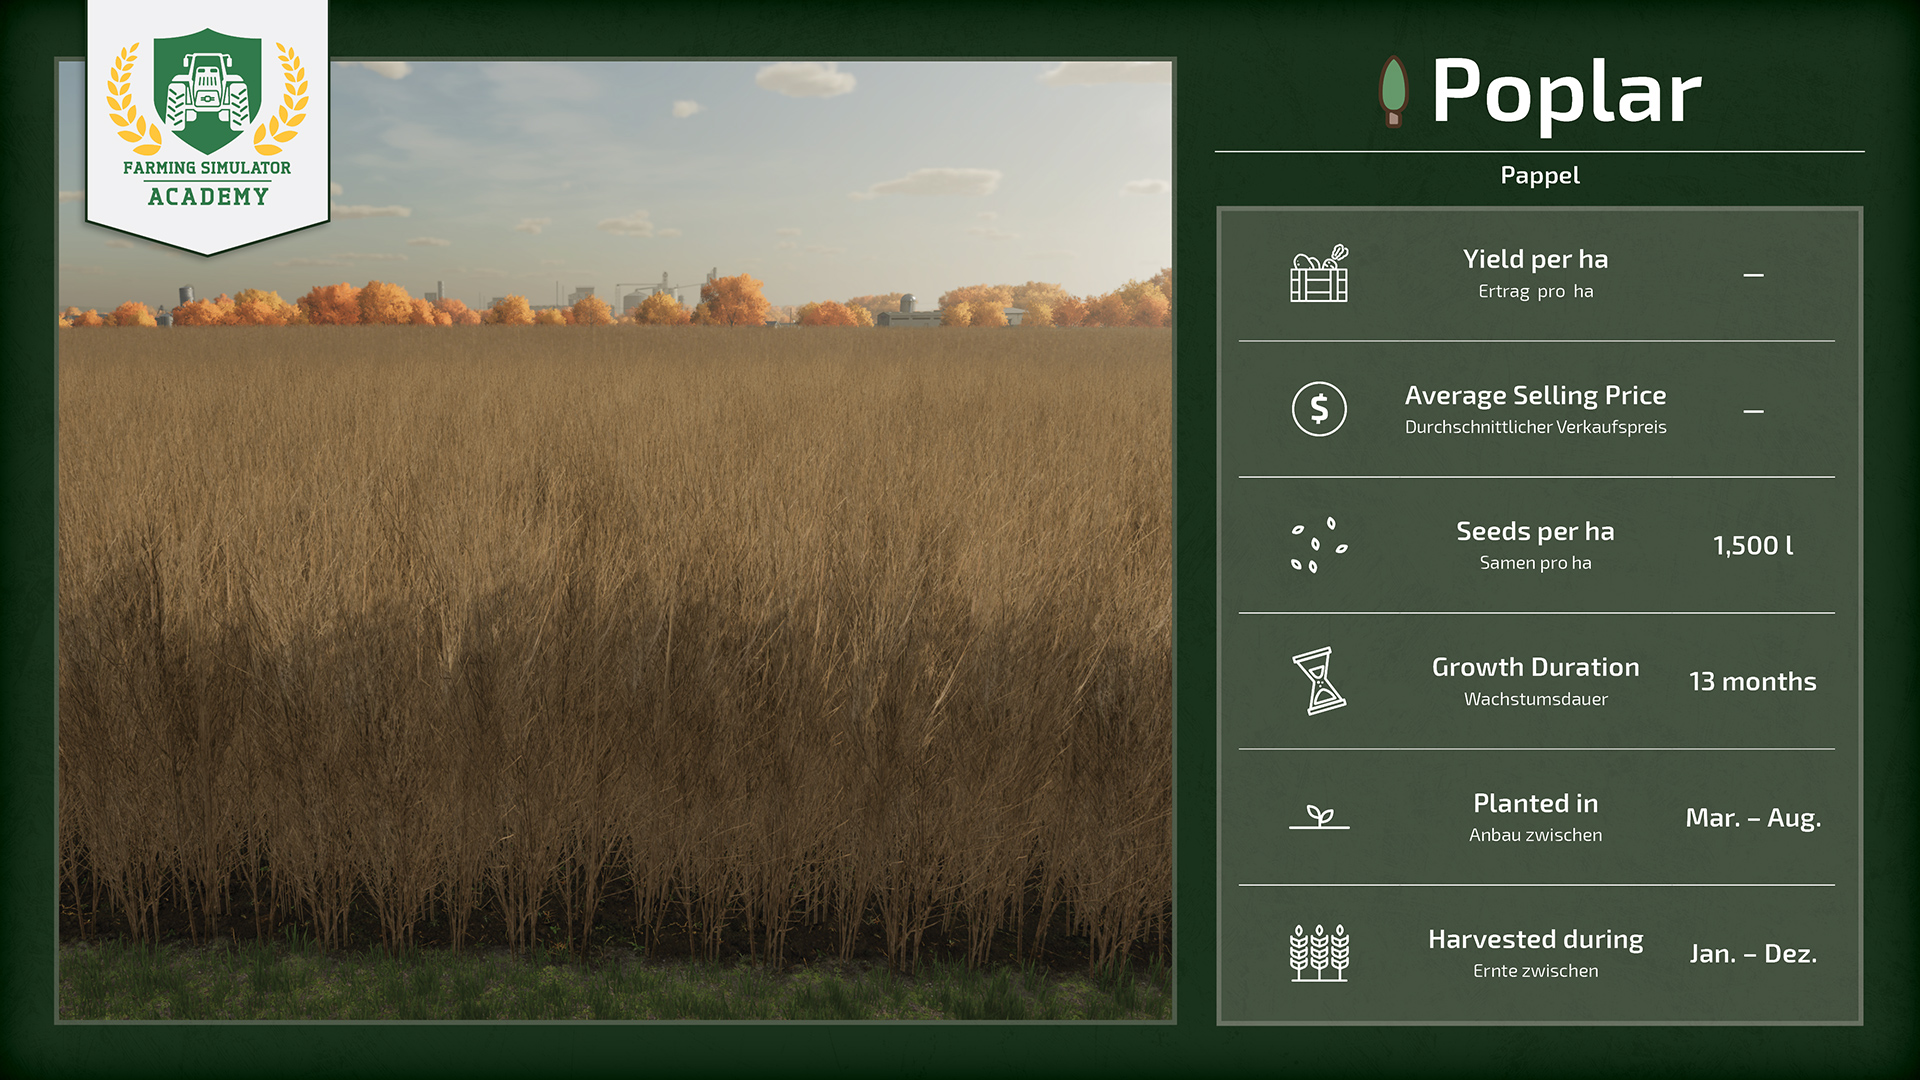
Got everything you need? Then let’s start on your assignment and plant some crops. Note, that you can only plant poplar between the beginning of March and the end of August if seasonal growth is enabled.
Step 1: Planting poplar
Get the planter of your choice attached to your tractor and head over to the field. Position yourself at one corner of the field, lower the planter and turn it on. Now, plant away!
Tip! Do yourself a favor and don’t speed up the time while doing this, or the crops will grow unevenly.
Optional: After you're done with planting, you can also use a soil roller to condense the soil and increase the yield by additional 2,5%. You don't have to, though. If small stones are left on the field, they get pushed back into the soil, so they don't damage your harvester, later.
Step 2: Apply fertilizer and lime
Fertilizer will improve the yield. Click on the bigbag category and buy the Solid Fertilizer Bigbag. Then, hook up your spreader to your tractor, position it right next to the BigBag and click the button to refill.
Back on the field, you turn it on and cover the whole field in fertilizer. It should now be fertilized to 50%, look at the right corner box while standing on the field. It’s okay if there are some tiny spots still not covered.
Does the field tell you it also needs lime? Then head back to the shop, buy lime and repeat the same procedure. If you have fertilizer left, you can unload it first at your farm.
Tip! Repeat the process after planting or activate double application rate to increase fertilization and the yield even further.
Step 3: Harvest the poplar
Unlike other crops, poplar doesn’t wither. You have all the time in the world to harvest. Take your tractor and attach the baler and the bumper. On the field, lower the machine, start the engine and proceed to harvest. The cut down poplar results in a bale as soon as the fill-limit of 2,000 liters is reached. Unload the bales directly on the ground, we pick them up later with the trailer.
If you are using the more expensive alternative (the New Holland FR 780 harvester), you can attach the Kaweco Radium 255 trailer directly to the harvester. On the field, you lower the header, start the machine, unfold the pipe and start harvesting.
Step 4: Selling the poplar
Are you done with the baling? Now, let's pick up the bales with the Anderson RBM 2000 trailer. After attaching it to your tractor, you need to activate the module that picks up the bales. Drive by the bales to pick them up, they will get loaded onto the trailer. Take a look at the prices screen to check where you can sell them for the highest price.
Tip! Wood chips from poplar can’t be stored in a silo. If you want to sell it later, you have to unload it on the ground, leave it in trailers or store the bales.
Well done!
Congratulations, you harvested and sold poplar. Take your time and start on the next lesson, when you’re ready. And don’t forget to clean up your machines once in a while. Stay with the Farming Simulator Academy and you become a virtual farmer in no time!


